Maintaining a collection of fine jewelry is an exercise in both preservation and appreciation. Over time, environmental factors such as humidity, sulfur in the air, and even the natural oils from our skin conspire to dull the brilliance of our most cherished pieces. Whether it is a family heirloom made of German silver or a contemporary brass statement piece, tarnish is an inevitable byproduct of the passage of time.
While professional cleaning services and commercial chemical dips are widely available, they often come with a high price tag or contain caustic ingredients that can be harmful to the environment and, eventually, the metal itself. This comprehensive guide explores the science and art of the DIY Electrolytic Jewelry Cleaning Method—a safe, budget-friendly, and highly effective way to restore your collection using simple pantry staples.
Chapter 1: Understanding the Chemistry of Tarnish
Before diving into the cleaning process, it is essential to understand why jewelry loses its luster. Tarnish is not “dirt”; it is a chemical reaction.
The Science of Oxidation
Most jewelry metals, particularly silver and brass, react with sulfur and oxygen in the atmosphere. This results in the formation of a thin layer of metal sulfide or oxide on the surface. For silver, this appears as a black or yellowish film known as silver sulfide.
The Electrolytic Solution
The DIY method we are discussing is far superior to traditional polishing. Polishing is abrasive; it works by physically rubbing away a tiny layer of the metal to reveal the shine beneath. Conversely, the electrolytic method uses a chemical reaction to turn the tarnish (silver sulfide) back into the original metal (silver).
By using aluminum foil, baking soda, and hot water, you create a “battery” of sorts. The aluminum has a higher affinity for sulfur than silver does. In the presence of an electrolyte (salt and baking soda), the sulfur atoms are chemically “pulled” from the jewelry and transferred to the aluminum foil. This is why the foil often turns dark during the process while the jewelry becomes bright.
Chapter 2: Essential Supplies and Preparation
One of the greatest advantages of this method is that the “ingredients” are likely already in your kitchen.
What You Will Need:
-
Aluminum Foil: Acts as the “anode” to attract the tarnish.
-
Baking Soda (Sodium Bicarbonate): Acts as the primary electrolyte.
-
Table Salt: Enhances the conductivity of the water.
-
Mild Dish Soap: Breaks down grease, lotions, and body oils.
-
Boiling Water: Heat accelerates the chemical reaction.
-
Glass or Ceramic Bowl: Avoid metal bowls, as they can interfere with the reaction.
-
Soft Microfiber Cloth: For the final drying and buffing.
Safety Note on Gemstones
Crucial Warning: This method involves hot water and a chemical reaction. While safe for solid metals like Sterling Silver, Gold-Filled, Brass, and German Silver, it should not be used for:
-
Porous Stones: Opals, pearls, turquoise, and emeralds can be damaged by heat or chemicals.
-
Glued Settings: Hot water can dissolve the adhesives used in costume jewelry.
-
Antique “Patina” Pieces: If your jewelry has an intentional dark “antique” finish in the crevices, this method will remove it.
Chapter 3: Step-by-Step Restoration Guide
Step 1: The Lining
Line the bottom of your glass bowl with a sheet of aluminum foil. Ensure the shiny side is facing up. This maximizes the surface area available for the chemical transfer.
Step 2: The Mixture
Add one tablespoon of baking soda and one tablespoon of salt to the bowl. Squirt a small amount of mild dish soap into the center. The soap ensures that surface oils don’t block the electrolytic solution from reaching the metal.
Step 3: The Activation
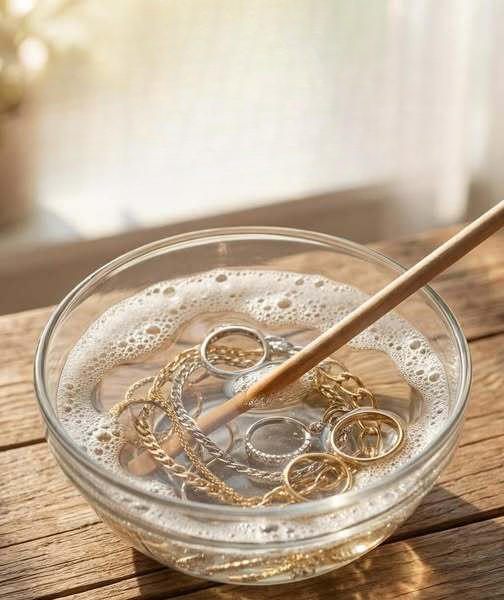
Pour boiling water into the bowl. You will see the mixture fizz and bubble—this is the baking soda reacting. Stir gently with a plastic or wooden spoon until the solids are mostly dissolved.
Step 4: The Submerge
Place your jewelry into the bowl. Important: Every piece of jewelry must be in direct physical contact with the aluminum foil. If you are cleaning multiple pieces, try not to stack them; let them spread out across the foil surface.
Step 5: The Magic Moment
Almost immediately, you may notice a slight “rotten egg” smell. This is actually a good sign! It is the sulfur gas being released from the metal. Let the jewelry soak for 5 to 10 minutes. For heavily blackened silver, you may see the tarnish literally float away from the metal.
Chapter 4: Handling Specific Metals
Gold-Filled vs. Solid Gold
Gold-filled jewelry consists of a thick layer of gold bonded to a base metal. Unlike gold-plated jewelry, which is very thin, gold-filled pieces are durable enough for this cleaning method. However, keep the soak time to under 5 minutes to prevent any unnecessary stress on the bonded layers.
The Challenge of Brass and German Silver
Brass (a copper-zinc alloy) and German Silver (a nickel-copper-zinc alloy) are prone to heavy oxidation. Because these metals are “harder” than sterling silver, they may require a gentle rub with a soft toothbrush while submerged in the solution to help the baking soda penetrate deeper tarnish layers.
Chapter 5: Long-Term Jewelry Preservation
Restoring shine is wonderful, but preventing tarnish is even better. To keep your jewelry radiant between cleanings:
-
The “Last On, First Off” Rule: Always put your jewelry on after applying perfume, hairspray, and lotion.
-
Dry Storage: Store jewelry in a cool, dry place. Consider adding a small packet of silica gel or a piece of chalk to your jewelry box to absorb moisture.
-
Individual Pouches: Prevent metals from reacting with each other (and from scratching) by using separate cloth bags.
Conclusion: Beauty Restored
The ability to care for your own collection is a rewarding skill. By using this DIY electrolytic method, you are not only saving money but also engaging in a safer, more scientific approach to maintenance. In less than ten minutes, you can transform a dull, neglected piece into a brilliant work of art, ensuring that the memories attached to your jewelry continue to shine for years to come.